![[ TUTORIAL ] - Replacing the foam in a film camera](http://antikea-photo.com/cdn/shop/articles/Antikea-Photo_-_Tutorial_-_How_to_replace_the_foam_of_a_camera.jpg?v=1699010926&width=1100)
Tutorial also available in French 🇫🇷 : Here
This tutorial is a general how to.
We are currently working on illustrated instructions for every camera. Look for the foam kit for your camera on the search bar, the illustrated instructions may be available in the product page.
This is a work in progress, some cameras are available, other aren't. We are working on it but it takes a lot of time as you can imagine.
If you have difficulties to find where each piece goes, go to Ebay looking for good pictures of your camera. You will be able to see the placement of the foam pieces.
And you can still contact us via email if necessary (Take 5 minutes to do some reseach before please, the mailbox is already bombarded. If you are still lost, we will be pleased to help you !).
----------
Over time, the foam parts used to perfect the light-tightness of film cameras deteriorate.
This results in leaks on the film, making the camera unusable as is.
At Antikea, we've replaced the foam on hundreds of cameras. In this tutorial, we share our experience with you so that you too can carry out this operation as easily as possible.
WARNING : Cameras have many fragile parts such as curtains and mirrors. Be careful not to damage them inadvertently ! We can't be held responsible for any mishandling.
In this tutorial, we will detail all the operations and points to be careful about.
Replacing foam isn't a very complicated operation if you have the patience and method, but a few mistakes can still be made. Take a few minutes to read this page in full before starting the operation. It would be a shame to damage your new acquisition inadvertently.
First step : Diagnosis
Does your camera's foam need replacing?
Over time, the foam in cameras degrades. This results in light leaking onto the film and/or mechanical malfunction.
Degraded foam is easy to recognise : it's sticky and crumbly, and most of it is already gone. If this is the case, replacement is necessary.
It's also possible that they look fine, but disintegrate as soon as you touch them. In this case, replacement is also necessary.

Second step : Equipment needed
Replacing the foam on a camera doesn't require a lot of equipment, but there are a few essentials.
The list of essentials is :
- Replacement foams
- A few toothpicks and cotton buds
- A little water or rubbing alcohol (preferably, but a few precautions should be taken - see below).
However, we strongly recommend that you also buy a pair of precision tweezers, which will make your work much easier.
Believe us, placing 2mm pieces of foam at the bottom of a mirror cage when you've only got your fingers to spare is nothing short of heroic.
Here's the list of materials we use in real life to replace the foam in our appliances :
- A foam kit corresponding to the appliance to be treated
- A little 90° alcohol
- Precision tweezers
- A few bamboo toothpicks
- A few cotton buds with paper stems
- A cutter
- A good cup of coffee
- And a bowl to put all the waste in, so as not to turn the work surface into a scene of war
You can find pre-cut foam kits here :
https://antikea-photo.com/search?q=kit&options%5Bprefix%5D=last
If you don't already have a kit for your camera model, you can find foam boards here :
https://www.ebay.fr/itm/193785003066
And you can find the precision pliers here :
https://antikea-photo.com/products/premium-precision-tweezers-for-camera-and-other-electronical-repair
You can buy rubbing alcohol in any DIY shop.

Third step : Protection
This step is not compulsory, but is highly recommended.
Essentially, it involves protecting the appliance's curtains, which are extremely fragile. To do this, simply tape a sheet of paper in place as shown in the photo below.
It's not really necessary to protect the other parts (viewfinder, mirror, frosting, etc.) but you should always work carefully to avoid damaging them. If in doubt, protect more.

Fourth step : Cleaning
There's no miracle: you have to start by removing the old foam before installing the new. This is the longest and most tedious stage. Old foam is generally very sticky. Work methodically to avoid getting it everywhere.
Take a toothpick and scrape the old foam to remove a few pieces, then remove them as you go along using a cotton bud. Don't let your appliance become a battlefield because the sticky bits of foam will get everywhere and it's a hell of a mess to clean up.
On some appliances, you'll find felt instead of foam. We don't recommend replacing them unless they are damaged.
They're generally in good condition, so replacing them won't have much effect, and you'll be able to keep as much of your original appliance as possible.

To make the job easier, we can use rubbing alcohol. The 90° alcohol will dissolve the foam glue and make cleaning much easier. However, there are a few important precautions to take, which we'll explain in more detail below.
To apply the rubbing alcohol to the foam, the best technique is to use the precision tweezers. Simply dip them in the alcohol and 1 drop or so will remain trapped between the two blades of the tweezers. You can then apply it very precisely to the areas to be cleaned.
It's at this stage that you'll realise how important it is to have a good pair of precision tweezers at your disposal. It will make your work much easier, especially in very delicate areas, near fragile mechanisms or at the bottom of the mirror cage.


ATTENTION
There are two very important points to be made here !
If you are using 90° alcohol, it is very important that you control the quantity of alcohol you use, as it must not be allowed to spill into the mechanisms of the appliance. Simply soak the foam, nothing more. The alcohol must not run.
In fact, the glue used to hold the screws in place can be dissolved with alcohol (this is how we unblock them in the event of a repair). If alcohol inadvertently gets onto the wrong screws in the camera, it is theoretically possible that they will loosen and the camera will eventually stop working properly.
As you can see below, some mechanisms are very close to our working areas and alcohol can very easily leak into them.
It's important to control the amount you apply.

(Do not dismantle the base plate, this photo simply illustrates the proximity of the mechanisms to our work area).
The second point is the importance of protecting the camera curtain.
On some cameras (they are relatively rare but let's not take any unnecessary risks) the anti-friction coating on the curtain blades can be dissolved by 90° alcohol. If this is the case, a single drop on the curtain will make it sticky, the slats will no longer slide perfectly and your camera will be thrown in the bin.
The same applies to the fabric curtains of certain appliances, which are often glued to reels inside the appliance and whose glue can be dissolved by rubbing with rubbing alcohol.

One drop of alcohol in the wrong place and your appliance is potentially ready for the dustbin.
While rubbing alcohol is a great help for cleaning, it should be used sparingly and methodically. If you don't feel the operation, simply scrape off the foam 'dry' and then clean the surface with a cotton bud lightly soaked in alcohol. You'll get the same result, it just takes a little longer.
To be perfectly honest, we've quite exaggerated the risks in the section above. The chances of you destroying your device are very slim and you'd really have to drown it in alcohol to have problems.
But it's a good idea to take a few precautions to ensure that everything runs smoothly.
One last tip for cleaning: a paper cotton bud cut at an angle is very effective for cleaning the grooves in the chassis.

Now you can drink half your coffee and clean up the mess you made on your worktop.
(But you were warned that you had to work clean! :) )
Now it's time for the best part, fitting the new foam.
Fifth step: Installing the new foam
Installing the new foam is a simple operation, but once again you need to work methodically.
Start by identifying the location of the foam blanks.
The double-sided adhesive we apply is very strong (to ensure optimum durability) and you won't be able to peel the pieces off easily without damaging them if you've put them in the wrong place.
So you need to get everything right first time.
It's possible that the foams in the kit don't quite match the old foams you'll find in your appliance. When manufacturing kits, we normally copy the dimensions of the original foams.
However, sometimes manufacturers have modified the foams during production, so it's possible that certain appliances (or similar variants based on the same chassis) are originally fitted with 2, 3, 4, ... different foam configurations.
When this is the case, we copy the configuration that seems most suitable, based on our experience.
We recommend you start with the simplest foams, which are generally the shortest.
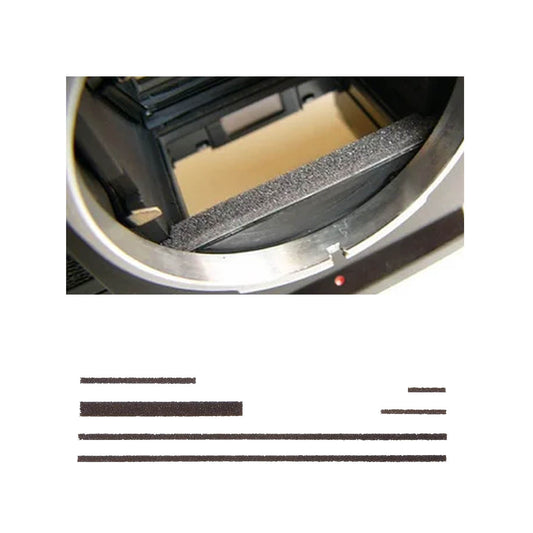
For this Mamiya, we'll start with the mirror foam.
All you have to do is peel the protective backing off the double-sided adhesive, hold the piece of foam in the pliers and then place it in the right place. Nothing too complicated, just be careful not to drop the foam once the protective adhesive has been removed.


Then apply pressure to the freshly laid foam so that it sticks perfectly.

For longer pieces, we recommend that you lightly glue one end of the foam to one of your fingers, then use the pliers to place the other end in the desired position.
Then slowly work your way up until you've completed the job.

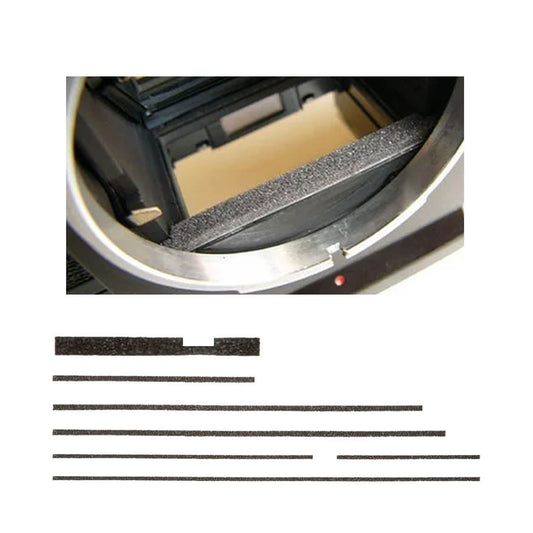
The finished door :

Let's move on to the most tricky part, fitting the two chassis foams.
These two parts are found on the vast majority of film cameras, but it's quite possible that yours doesn't have them.
We've simply decided to devote a section specifically to these parts because they are the most difficult to fit, and the few tips you'll find below will be a great help.
To begin with, the number one rule isn't to peel off all the protection at once. The foam pieces then become so soft and sticky that they are very difficult to handle.
Peel off just 1 or 2 cm at a time, as you go along.
Like this :

Next, always start laying the foam on the right-hand side of the appliance, along the hinge (which is usually where the foam is laid).
Stick the end of the foam as close to the end as possible and work your way up from there.
Once the foam is completely in place, it may not go all the way to the end of the throat. This is perfectly normal; on some models the foam goes all the way to the end, on others it stops a little before that.

For the top foam, you'll often find the counting finger in the throat, in the path of the foam.
Depending on the model of appliance, the foam may either pass over the top or be divided into two pieces. Both versions exist, depending on the manufacturer and the machine.
It doesn't really matter, though, as the counting finger still has plenty of strength to do its job despite the foam on top. On the Mamiya ZE Quartz, the original foam goes over it and that's what we've reproduced for the kit.

Once the end of the foam is glued in place, simply peel off the protective paper centimetre by centimetre and glue the piece in place using the pliers.

If your piece of foam is twisted (which can happen quite often at first), simply apply one or two drops of alcohol to the twisted area. The glue will then become non-adhesive for a few minutes and you'll be able to reposition the foam more easily.
Once the alcohol has evaporated, the adhesive will regain its original properties.
However, try to repeat this operation as little as possible.


Regarding the 'Z' often found on 35mm cameras, we deliberately cut the foam straight because it is easier to fit this way.
With 'Z' foam, the slightest deformation of the foam during installation shifts the 'Z' of the piece next to the 'Z' of the casing.
The only way to fit a piece of foam with a 'Z' properly is to start in the middle, which is much more difficult, especially for beginners.
After carrying out a number of tests and finding no difference in terms of light-tightness, we have decided to offer only straight foam where possible.
To fit, simply push the foam through the Z, using the tweezers to gently glue it in place as you go.
A drop of alcohol may help if you're just starting out.
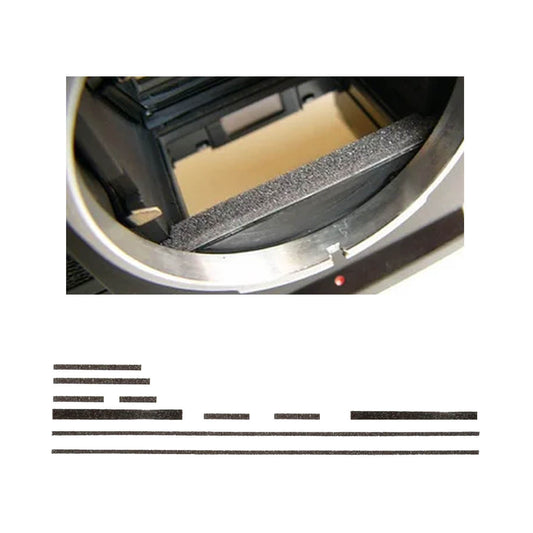
And here's the result

Congratulations!
All the foam in your appliance is new and it's ready for another 20 years.
Closing the door for the first time will be a little difficult, but that's perfectly normal. The foams are deliberately a little thicker than necessary so that they fit perfectly on both sides of the appliance when closed.
They will take their final shape after a few hours.

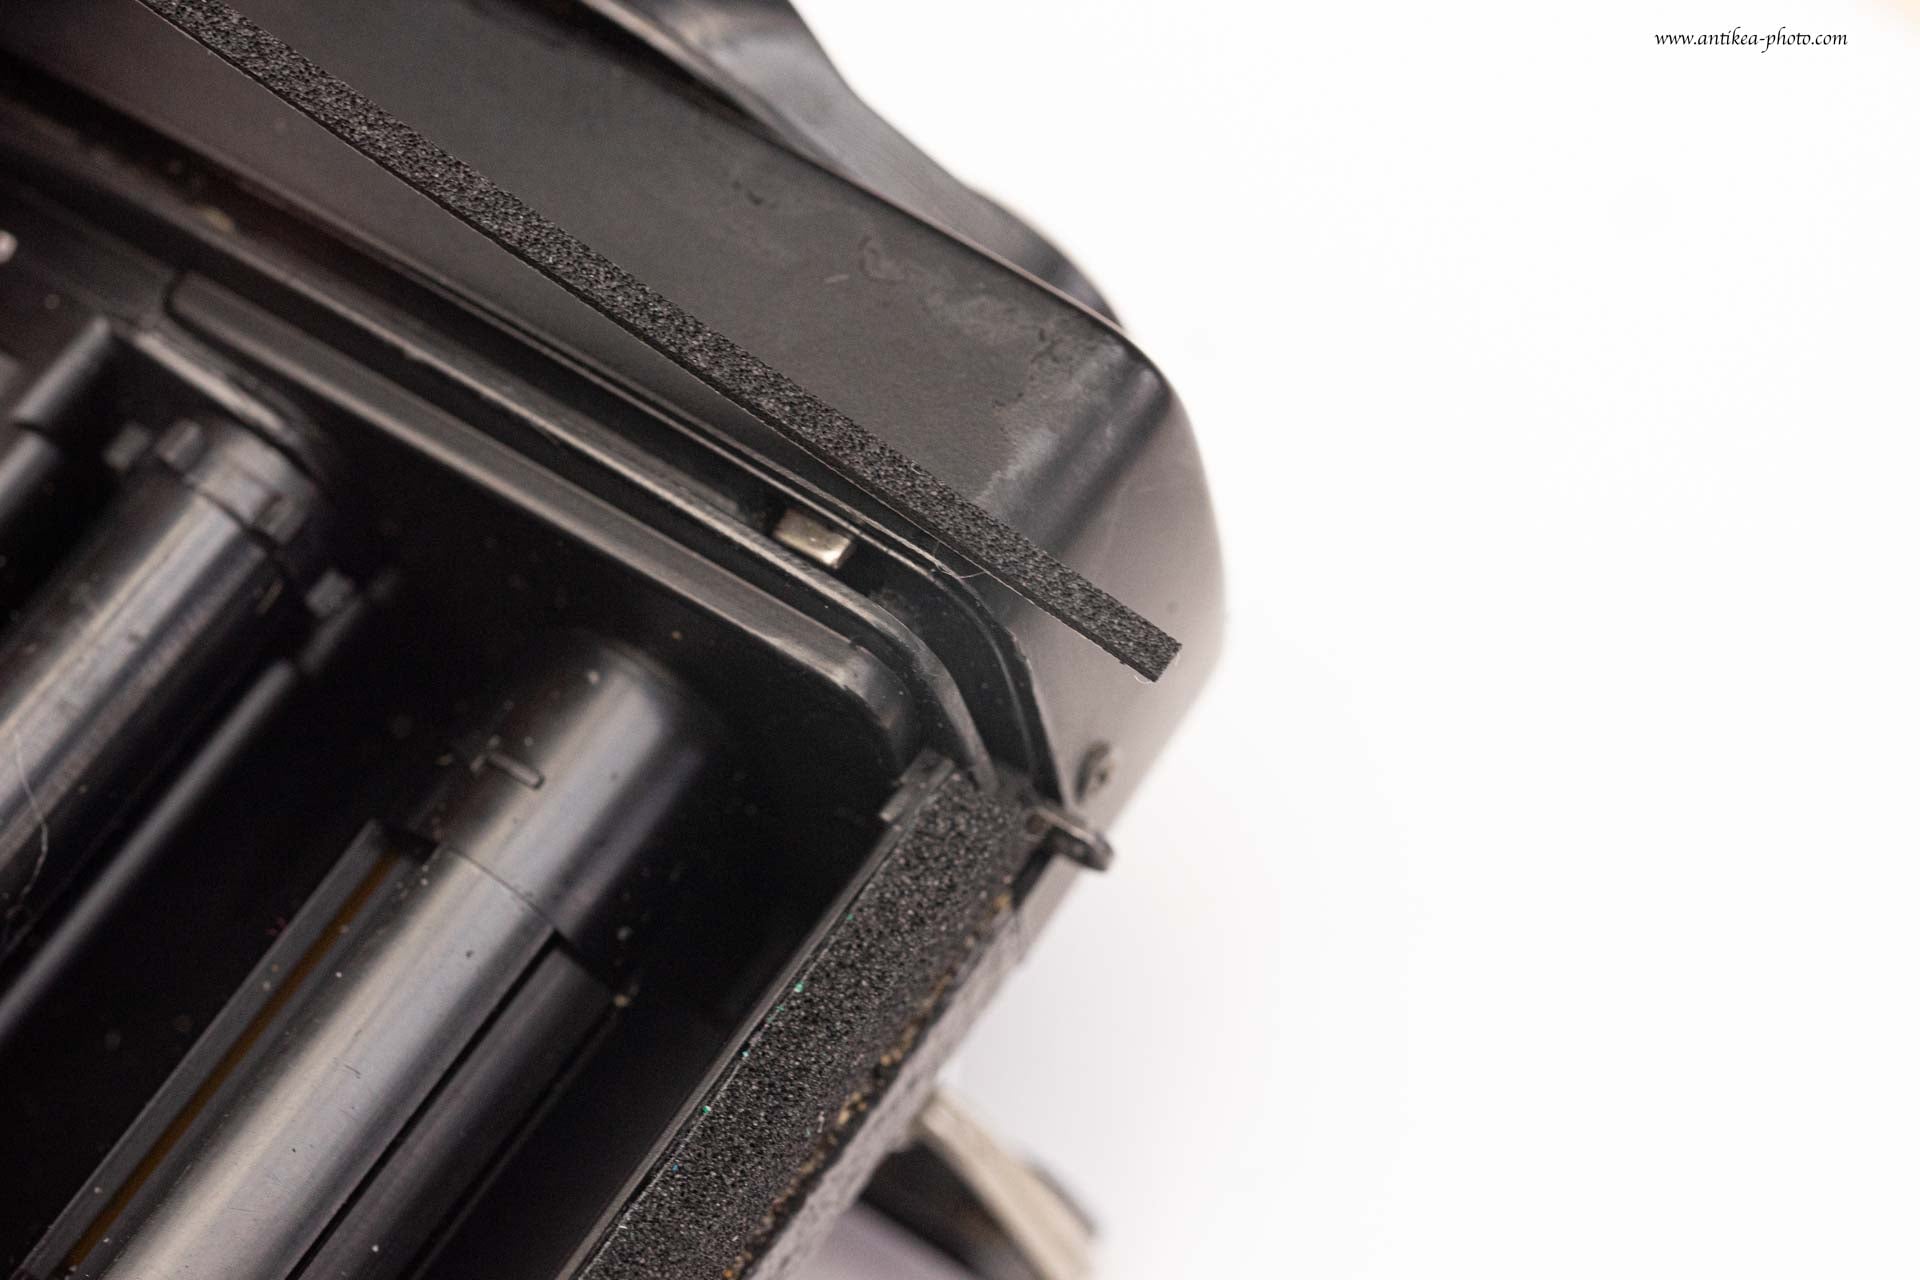
The foam in the hinge, once it has taken its final shape
You've earned the right to finish your coffee and set off to test your new toy.
New foam is good, but photos are even better !
Articles featured is this tutorial
Pre-cut foam kits are available here :
https://antikea-photo.com/search?q=kit&options%5Bprefix%5D=last
The precision pliers are available here :
https://antikea-photo.com/products/premium-precision-tweezers-for-camera-and-other-electronical-repair
Don't hesitate to ask us your questions in the comments section below.
We'll be in touch regularly to answer them.